

You won’t get same-day delivery for a full-motion, training device anytime soon. Even if a drone can tote 3,500 pounds worth of flight simulator, we aren’t hipster enough to commoditize irony. More importantly, though, we build our AATDs to order and complete the fulfillment onsite. That's still the best method, and here's why.
When you invest in flight simulation, you’re receiving a process as much as a product. The simulator allows you to focus on one area of flying at a time, then pause, give feedback, and start over again. It’s a useful tool, made even more useful with collaboration. So, to optimize the device for your training goals, that collaboration should start early - with consultation, customization, and installation.
Setting the Scene
Pre-departure communication is the most important part of the installation. For packing and planning, it’s important to understand the following:
- Do we need an access code or key to enter your facility?
- Where in the facility are we installing the simulator, and what do we need to know about accessing the room?
- On what floor is the room?
- If it isn’t on the first floor, do you have an elevator?
- How wide are the doorways we’ll be using?
- What are the dimensions of the room where we’re installing the sim?
- Is the room empty?
- Does the room have electrical outlets and an internet connection?
- Can we hire local labor, or do you have students or instructors who would help us assemble the simulator? We'll pay them, of course!
Occasionally, new customers will omit details. Resist that urge! We won’t charge you for installing a wireless router. But if we think there's one in the room when there isn’t, it only adds time to the installation. Every missing part is a missed training opportunity.
The Build
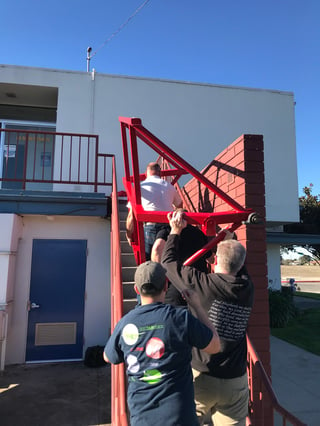
On day one of the installation, we unpack the simulator and start assembling it. Based on your facility and the simulator model, this step can overflow into day two. The frame is very sturdy. See also: heavy.
If you've purchased a full-motion device, we’ll position the frame to optimize its range of motion. In other words, we want you to yaw as far as possible without blasting through a window. Once it's positioned, we’ll put the simulator together. This step requires the most amount of time and the least amount of description. Let's move on to the fun stuff.
Calibrate, Good Times. C'mon.
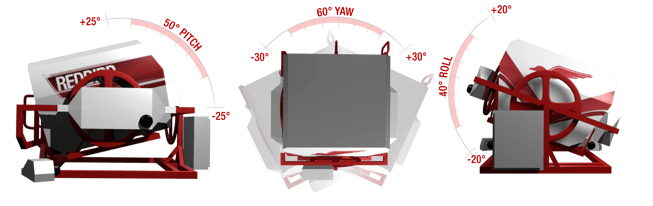
For full-motion devices, calibration is step 2/2 of Operation Window Preservation. It's when we align the simulator's range of motion with the room’s dimensions.
However, it's worth mentioning that both steps are a formality if the room is big enough. To see the room requirements for all our devices, navigate to the product pages on our website.
If your room meets the requirements, you can operate the simulator safely with a full range of motion. For most of our motion devices, full-range means 50 degrees pitch, 60 degrees yaw, and 40 degrees roll.
Testing
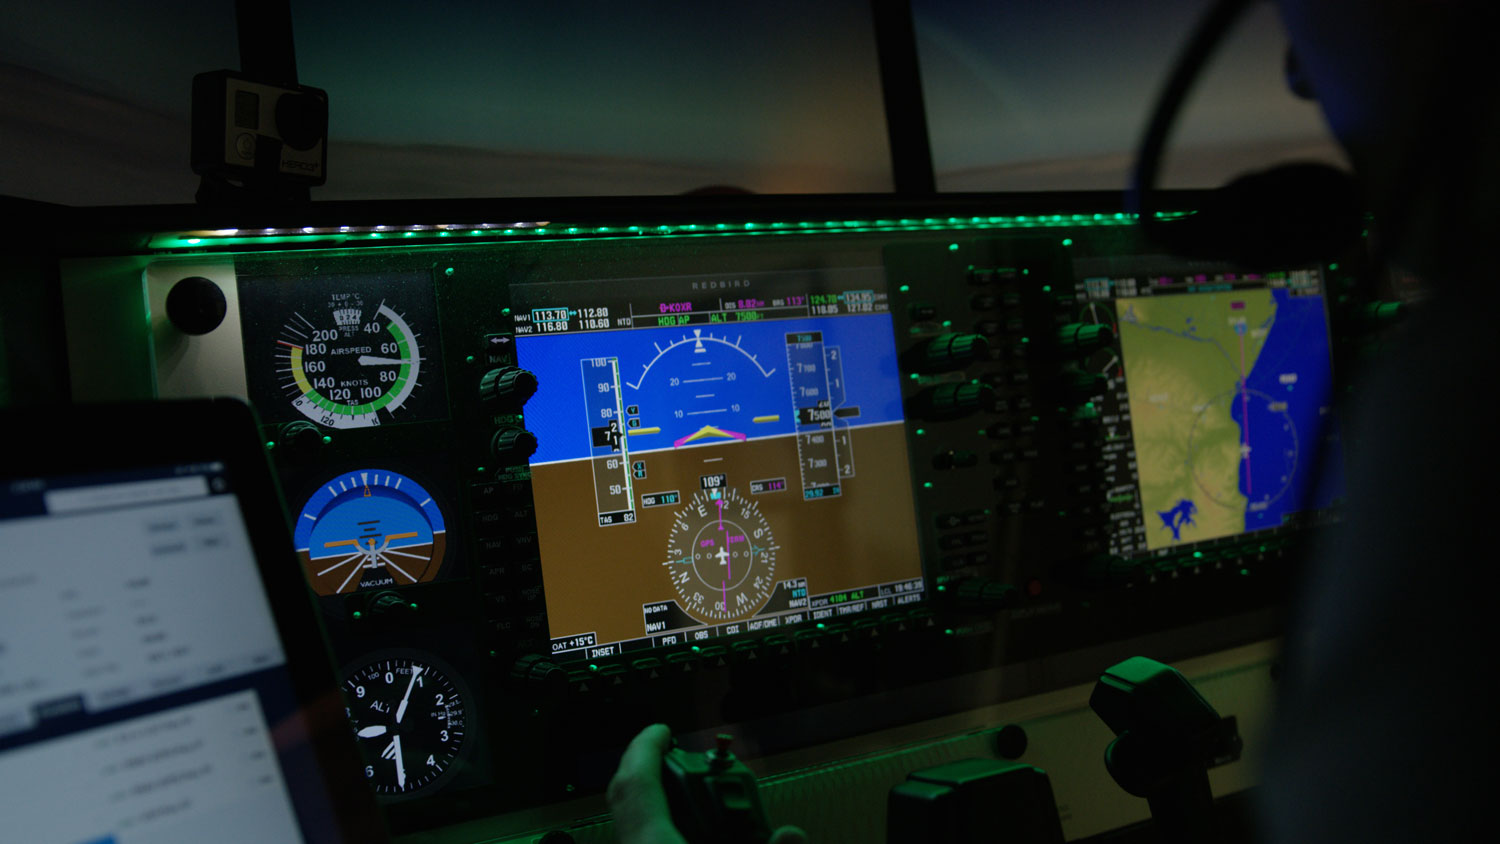
Next, we’ll make sure the computer, avionics, and motion platform are in harmony. Using the Instructor Station in Navigator, we’ll test several features for realism:
- Airports and Navaids
- Wind - direction, speed, and gusting
- Basic Weather - turbulence, basic conditions, VFR and IFR conditions
- Advanced Weather - surface visibility, surface wind, visibility layers, cloud layers
- Time - Zulu or time profile
- Failures
Then, blending several of the above features, we'll create a unique profile and pilot a free flight. It's the best way to verify that the motion and visual cues are timed correctly.
Here's an example test:
- Start on the ground of the local airport, at night, in the midst of scattered thunderstorms.
- Add some wind down the runway.
- Mix in a few cloud and visibility layers for the climb.
- At cruising altitude, hey, there's that thunderstorm. Light turbulence kicks in.
- After cruising for a few minutes, it's time to identify a local airport and fly an instrument approach.
If all feels right, it's your turn to take the yoke.
Related Content: A Look Inside Navigator 2.0 [Webinar]
Training Day
Once the simulator is in working order, we'll offer training for instructors and staff. We use this time to walk through Navigator. You'll learn best practices for starting and saving flights, setting weather and time, using the map feature, and applying failures. If you’ve purchased any add-ons - such as Insight, Cygnus, or GIFT - we’ll explain how to set up and integrate those tools as well.
Beyond product familiarity, training helps you start implementing the simulator into your curriculum. It's great to understand how the features work, but even better to know how you want to take advantage of them. You'll need to do two things:
- Identify skills that you want to develop in the Redbird (ideas here)
- Adopt best practices for training those skills (tips here)
We frequently create content for continued education, but onsite training is invaluable for immediate feedback. So, we encourage you to attend and bring questions!
Share this
What To Expect at AirVenture 2022
Think Outside the Box: 5 Specialized Courses to Expand Your Flight Training Business
-1-1.png)